Side Dishes
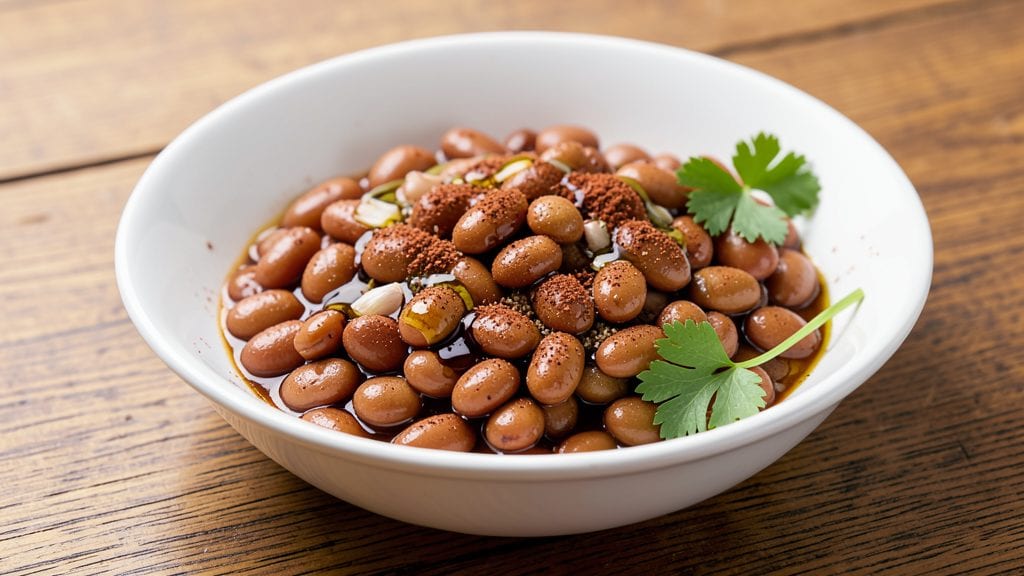
Transforming canned kidney beans into a vibrant side dish that shines at any table takes just 15 minutes of your time—and this vinegar-braised method delivers restaurant-quality results without the fuss. The secret lies in balancing bright acidity with savory depth, creating a dish that’s both simple and unforgettable.
I developed this recipe after realizing how often canned beans get overlooked in favor of fresh, when they can actually be the star of the show with the right technique.
What makes this recipe work is the vinegar braise, which tenderizes the beans slightly while infusing them with a tangy brightness that cuts through richer dishes. Olive oil, garlic, and a touch of smoked paprika add layers of flavor without overpowering the natural earthiness of the beans.
The dish comes together in one pot, making it perfect for weeknight dinners or meal prep—no special equipment required.
By the time you serve this dish, you’ll have a glossy, flavorful side that’s crisp at the edges and perfectly seasoned throughout. The vinegar braise gives the beans a subtle sheen, while the aromatics create a scent that fills your kitchen with warmth.
It pairs beautifully with grilled meats, roasted vegetables, or even as a standalone vegetarian main with crusty bread.
This recipe is designed to be versatile and foolproof, so you can adjust the seasoning to your taste or swap in other canned beans if needed. The key is patience in the braising step—letting the flavors meld ensures every bite is packed with brightness and depth.
Ready to elevate your canned beans game? Let’s get cooking.
Ingredients for canned kidney beans
Bright acidity meets savory depth in this quick, restaurant-style kidney bean dish.
| Ingredient | Amount | Notes |
|---|---|---|
| Canned Kidney Beans 🌱 | 2 cups | Drained and rinsed thoroughly |
| Extra-Virgin Olive Oil 🫒 | 2 tbsp | High quality, fruity variety |
| Garlic Cloves 🧄 | 3 cloves | Minced finely for aroma |
| Red Wine Vinegar 🍷 | ¼ cup | Balsamic works too |
| Smoked Paprika 🌶️ | 1 tsp | For subtle smokiness |
| Ground Cumin 🌿 | ½ tsp | Toasted for deeper flavor |
| Salt 🧂 | ¾ tsp | Kosher or sea salt |
| Black Pepper 🌶️ | ¼ tsp | Freshly ground preferred |
| Fresh Parsley 🌿 | ¼ cup | Chopped, for garnish |
| Lemon Juice 🍋 | 1 tbsp | Freshly squeezed |
| Vegetable Broth 💧 | ½ cup | Low-sodium preferred |
| Honey 🍯 | 1 tsp | Balances acidity |
The beans are the star, so look for low-sodium canned kidney beans—they taste better without extra salt. I always grab the no-salt-added variety at Trader Joe's or Costco, but any good brand works. The vinegar is key here—red wine vinegar gives the best balance, but balsamic adds a sweeter note if you prefer. Fresh parsley might seem like a small detail, but it adds that final pop of color and brightness that makes this dish look restaurant-worthy. Toast your cumin seeds in a dry pan for 30 seconds first if you're feeling fancy—it makes a huge difference.
No red wine vinegar? Apple cider vinegar or white wine vinegar work in a pinch, though the flavor will be slightly different. Fresh parsley wilt fast, so dried parsley at one-third the amount is fine if you're in a hurry. The honey balances the acidity beautifully, but maple syrup works too—just use the same amount. Want more depth? A pinch of ground coriander adds a citrusy note that pairs perfectly. The vegetable broth can be swapped for water, but the broth adds that extra layer of savory goodness that makes this dish shine.
This dish tastes even better the next day—make extra and store in the fridge for up to 5 days. The flavors meld beautifully over time, and it reheats perfectly. For meal prep, portion into containers with a drizzle of olive oil on top to keep the beans from drying out. If you're serving this as a vegetarian main, toss in some crumbled feta or avocado slices right before serving for extra richness.
Why You'll Love This Recipe
- Pantry Magic: I swear by this recipe because it turns three cans and a spice rack into something special—no fancy shopping required.
- Smoky-Sweet Balance: That smoked paprika and red wine vinegar combo? It’s the secret weapon—earthy, tangy, and just a little addictive, like a hug in your mouth.
- Lunchbox Hero: I pack these cold in salads or warm in wraps for work—holds up perfectly, tastes even better the next day, and my kids actually eat them.
- Budget Power Move: A can of beans, garlic, and olive oil? This feeds four for under $3. Honestly, it’s my go-to when I’m broke but refuse to eat sad food.
Step-by-step instructions for vinegar-braised kidney beans
This bright, flavorful dish comes together in minutes with just a few simple ingredients.
Sauté the Aromatics
Heat the 2 tablespoons extra-virgin olive oil in a medium saucepan over medium heat. Add the 3 minced garlic cloves and sauté for 1-2 minutes until fragrant but not browned—you should smell that fresh garlic aroma filling your kitchen. This step builds the flavor foundation, so don't rush it.
Next, stir in the 1 teaspoon smoked paprika and 0.5 teaspoon ground cumin, toasting them for 30 seconds until the spices release their warm, earthy aromas. The pan should smell rich and slightly smoky. This quick toasting enhances their flavors before we add the liquid ingredients.
Add Vinegar and Broth
Pour in the 0.25 cup red wine vinegar and 0.5 cup vegetable broth, stirring to combine. The vinegar will bubble slightly as it heats through. Let the mixture simmer gently for 3-4 minutes until it reduces by about 25%—you'll notice the liquid becoming slightly thicker and more concentrated.
This reduction step is crucial as it intensifies the flavors. You're looking for a glossy, slightly syrupy consistency that will beautifully coat the beans. If you see the mixture getting too thick too quickly, you can add 1-2 tablespoons water to maintain balance.
Incorporate the Beans and Simmer
Add the 2 cups drained and rinsed canned kidney beans to the saucepan, stirring gently to coat them evenly with the vinegar-broth mixture. Bring everything to a gentle simmer over medium-low heat, then reduce to low heat to maintain a slow, steady bubble.
Let the beans simmer for 8-10 minutes, stirring occasionally. You want the beans to absorb the flavors while the sauce continues to reduce slightly—this creates that perfect balance of brightness and richness. The beans should be heated through and tender enough to mash slightly between your fingers.
Finish with Bright Flavors
Remove the saucepan from heat and stir in the 1 tablespoon lemon juice and 1 teaspoon honey. The lemon juice adds a bright, citrusy tang that cuts through the richness, while the honey balances the acidity. Give everything a final taste and adjust the seasoning with the 0.75 teaspoon salt and 0.25 teaspoon black pepper as needed.
Let the beans sit off the heat for 2-3 minutes to allow the flavors to meld completely. This resting period ensures that every bean is perfectly seasoned and the sauce reaches its ideal consistency. The dish should have a vibrant, glossy appearance with a balance of sweet, tangy, and slightly smoky flavors.
Garnish and Serve
Transfer the kidney beans to a serving bowl and sprinkle with the 0.25 cup chopped fresh parsley. The parsley adds a fresh, herby note that brightens the dish visually and adds a touch of freshness to each bite. Serve immediately while the beans are still warm and the flavors are at their peak.
This dish pairs beautifully with crusty bread, grilled meats, or over rice. The bright, vinegar-braised beans make a fantastic side dish that adds depth to any meal. The combination of tangy, smoky, and slightly sweet flavors creates a truly satisfying dish that's quick to prepare but packed with restaurant-quality taste.
Pro Tips For Making Canned Kidney Beans
- Drain and Rinse Properly: Don’t just dump the beans straight from the can—give them a quick rinse under cold water. The canning liquid is salty, and skipping this step turns your dish into a sad, briny mess. I learned this the hard way after making a batch that tasted like a pickle jar exploded.
- Sauté Garlic Low and Slow: If you’re frying garlic in olive oil, keep the heat low. High heat burns it instantly, leaving bitter ashes instead of nutty flavor. The beans will get their turn to cook—let the garlic set the foundation first. (Yes, even if you’re impatient like me.)
- Toast the Paprika First: Bloom the smoked paprika in the oil for 30 seconds before adding anything else. This releases its aroma and deepens the flavor—like waking up a sleepy spice. Skip this, and you’re just sprinkling dust on your dish.
- Balance the Vinegar: Red wine vinegar cuts through richness, but too much makes the beans taste sharp and unfinished. Start with 1 tablespoon per can, taste, then add more if needed. (Pro move: Mix it with a pinch of sugar first—it smooths the acidity.)
Essential equipment for canned kidney beans
Basic Pantry Staples
You’ll need just a few essential tools to make this dish shine—nothing fancy required. A medium saucepan with a lid (I use a 3-quart stainless steel for even heating) is perfect for the braising process.
The lid helps concentrate flavors while reducing the vinegar mixture. A wooden spoon works best for stirring—it won’t scratch your pan like metal utensils. 🧑🍳
For measuring, a basic set of measuring spoons (like the OXO Good Grips brand) ensures precision with spices and liquids. A sharp chef’s knife and cutting board are essential for mincing garlic and chopping parsley.
If you don’t have one, a microplane for garlic is a game-changer—it creates a finer texture that dissolves beautifully into the dish.
Optional Upgrades
A fine-mesh strainer (like the EZ Clean Stainless Steel model) makes rinsing canned beans effortless, removing any residual sodium or debris. For flavor control, a digital kitchen scale helps measure spices like smoked paprika and cumin to the gram, ensuring consistency.
I keep one on my counter for recipes like this where precision matters.
If you love vinegar braises, consider a small glass jar (like a mason jar) for storing red wine vinegar—it preserves flavor better than plastic. A small bowl for tossing the finished beans with parsley keeps your workspace organized.
These extras aren’t mandatory, but they make the process smoother and more enjoyable.
Budget-Friendly Swaps
No saucepan? A deep skillet (like a Lodge cast iron) works just as well—its heavy base distributes heat evenly. For measuring, a standard tablespoon from your silverware drawer suffices in a pinch.
A paring knife can handle garlic mincing if you’re in a hurry, though it requires more effort. The key is adapting without sacrificing flavor.
Skip the fancy vinegar and use apple cider vinegar—it’s widely available and adds a fruity note. For broth, water + ½ teaspoon bouillon powder (like Knorr Vegetable) works in a bind. The dish’s bright flavors will still shine, even with basic substitutions. The goal is simplicity, not perfection.
Pro Tools for Perfection
A thermometer (like the Thermoworks Thermapen) helps monitor the simmer—aim for 195–205°F to avoid scorching the beans. For extra smokiness, a smoked salt (like Maldon Smoked Sea Salt) adds depth without altering the recipe’s balance. I sprinkle it over the finished dish for a restaurant-worthy touch.
For meal prep, glass storage containers (like Pyrex) keep the beans fresh for up to 5 days. Label them with the date to track freshness. A small whisk blends the vinegar and broth smoothly before adding beans, ensuring an even sauce.
These tools elevate the dish from good to extraordinary with minimal effort.
Nutrition facts
Frequently asked questions
Can I use canned kidney beans straight from the can without rinsing?
Rinsing is highly recommended to remove excess sodium and any preservatives. Simply drain the beans and give them a quick rinse under cold water. This step prevents the dish from tasting overly salty and helps maintain the vibrant flavors of the vinegar braise.
What if I don't have red wine vinegar?
Apple cider vinegar or white wine vinegar work perfectly as substitutes. For a sweeter touch, balsamic vinegar also pairs well. Just note that the flavor profile will shift slightly—apple cider adds a fruity note while balsamic brings a richer depth.
How do I prevent the beans from getting mushy?
Keep the heat at a gentle simmer (low-medium) and avoid boiling. Overcooking breaks down the beans' texture. The 8-10 minute simmer time is ideal—just until they're heated through and slightly tender. Stirring occasionally helps distribute heat evenly.
Can I make this ahead of time?
This dish tastes even better the next day. Store in an airtight container in the fridge for up to 5 days. The flavors meld beautifully, and it reheats perfectly. For meal prep, add a drizzle of olive oil before storing to keep the beans moist.
What are some great ways to serve these beans?
These bright beans pair perfectly with grilled meats, roasted vegetables, or as a vegetarian main with crusty bread. For extra protein, top with crumbled feta or avocado slices. They also work well in tacos, salads, or as a side for rice bowls.