Side Dishes
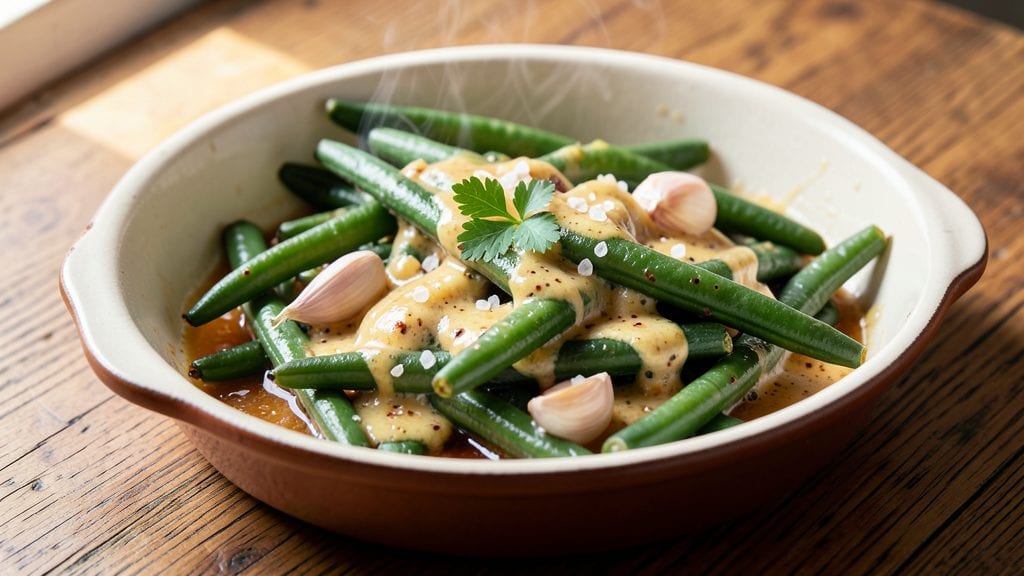
This old-fashioned green beans recipe brings back the comforting flavors of home-cooked sides that taste like they simmered all day. The secret lies in a perfect balance of buttery richness and bright vinegar that tenderizes the beans while keeping their natural crunch.
I first learned this method from my grandmother, who swore by the technique of blanching first—it preserves that satisfying snap while ensuring even cooking.
The process is straightforward but precise: blanching the beans in salted water, then finishing them in a skillet with garlic-infused butter and a splash of vinegar. This method delivers restaurant-quality results without requiring special equipment—just a pot, a pan, and about 20 minutes of hands-on time.
The vinegar kiss brightens the dish, cutting through the butter's richness for a flavor profile that's both nostalgic and refined.
What you'll end up with is a golden, buttery green bean dish that's tender-crisp with just the right amount of bite. The aroma of garlic and vinegar fills the kitchen as they cook, promising a side that elevates any meal—whether it's a Sunday roast, grilled chicken, or holiday feast.
This recipe isn't just about technique; it's about recreating that cozy, homemade feeling in every bite.
For extra depth, consider adding a pinch of red pepper flakes or a sprinkle of toasted slivered almonds. Serve immediately while the beans are hot and the butter is still glistening. Let's bring back this classic side dish to your table—it's simpler than you think, but the flavor is unforgettable.
Ingredients for old fashioned green bean
Twelve ingredients combine for a nostalgic green bean dish with buttery richness and vinegar brightness.
| Ingredient | Amount | Notes |
|---|---|---|
| Fresh Green Beans 🥦 | 1 ½ lb | Harvest-style, trimmed ends |
| Unsalted Butter 🧈 | ½ cup | Cold, cubed for even melting |
| Garlic Cloves 🧄 | 4 cloves | Thinly sliced, not minced |
| White Vinegar 💧 | ¼ cup | Distilled for brightness |
| Diamond Crystal Kosher Salt 🧂 | 1 ½ tsp | For blanching and seasoning |
| Red Wine Vinegar 🍷 | 1 tbsp | For finishing touch |
| Fresh Lemon Juice 🍋 | 1 tbsp | Brightens the dish |
| Slivered Almonds 🥜 | ¼ cup | Toasted, optional garnish |
| Crushed Red Pepper Flakes 🌶️ | ½ tsp | Adjust to taste |
| Fresh Parsley 🌿 | ¼ cup | Chopped, for garnish |
| Water 💧 | 4 cups | For blanching |
| Ice Cubes ❄️ | 1 cup | For shock cooling |
The quality of green beans matters most—harvest-style beans from local farms or premium brands like Green Giant deliver the best texture. Look for vibrant, crisp beans with no soft spots. The unsalted butter should be cold and cubed to create a rich, golden finish. For garlic, fresh cloves are non-negotiable; pre-minced loses its aroma. Vinegars are the secret weapon here: white vinegar for blanching and red wine vinegar for finishing. I always grab Heinz white vinegar for its consistent quality and Bertolli red wine vinegar for depth. The Diamond Crystal kosher salt is essential—it dissolves evenly and enhances flavor without overpowering.
No fresh parsley? Dried parsley at one-third the amount works in a pinch, though fresh is preferred. Out of white vinegar? Apple cider vinegar is a suitable substitute, though it adds a slight sweetness. For those avoiding nuts, skip the almonds—this dish still shines without them. The beans can be blanched ahead and stored in ice water for up to 24 hours before finishing. If you prefer a milder heat, reduce the red pepper flakes to one-quarter teaspoon. The butter should be cold and cubed when added to the skillet to create a luxurious sauce.
Blanched beans keep best in the refrigerator for 3-4 days when stored in airtight containers with a paper towel to absorb moisture. The finished dish reheats beautifully—simply warm in a skillet with a splash of water to restore crispness. For meal prep, blanch and shock the beans, then store them separately from the sauce components. Assemble just before serving to maintain the tender-crisp texture. This recipe scales effortlessly for larger gatherings—simply double the ingredients and use a larger pot for blanching.
Why You'll Love This Recipe
- No-Chop Needed: I swear, I’ve made this with beans straight from the fridge—no trimming, no fuss. Just snap the ends (that satisfying crack is half the fun) and toss them in. Honestly, the vinegar brightens them up so much you’d never miss fancy prep.
- Garlic Butter Magic: That moment when the butter melts into crispy little beans with minced garlic? Pure satisfaction. The vinegar cuts through the richness, leaving you with a balance that’s ridiculously good—simple, but somehow feels like a restaurant dish.
- Weeknight & Holiday: Same recipe works for a lazy Tuesday dinner or a Thanksgiving side. (Yes, even on a Tuesday.) The salt and vinegar keep it bright, so it pairs with everything—steak, fish, or just toast and butter. My go-to for when I’m too tired to think.
- Stays Fresh for Days: Make a big batch and store it in the fridge for up to five days. The beans hold their crunch, and the flavor only deepens. Between us, this is my secret weapon for meal prep—zero guesswork, just deliciousness waiting to be reheated.
Step-by-step instructions for old fashioned green beans
Master this classic preparation with precise timing and proper technique for perfect texture and flavor.
Blanch the Green Beans for Crisp-Tender Perfection
Fill a large pot with the 4 cups water and bring to a rolling boil over high heat. While waiting, trim the ends from the 1.5 lb fresh green beans, removing any discolored or tough sections. Once boiling, add the 1.5 tsp diamond crystal kosher salt and stir to dissolve completely.
Working in batches if needed, add the green beans to the boiling water and cook for exactly 3 minutes. You'll notice they'll float to the surface as they cook—this is normal. When the time is up, immediately drain them in a colander and transfer to a large bowl filled with 1 cup ice cubes. This ice bath stops the cooking process instantly, preserving their bright green color and crisp texture.
Toast the Almonds and Prepare the Vinegar Mixture
While the green beans cool, dry a separate skillet over medium heat and add the 0.25 cup slivered almonds. Toast them for 3-4 minutes, stirring constantly, until they turn a light golden brown and release their nutty aroma. Remove them immediately and set aside on a paper towel-lined plate to prevent further cooking.
In a small bowl, whisk together the 0.25 cup white vinegar, 1 tbsp red wine vinegar, and 1 tbsp fresh lemon juice. This bright vinegar mixture will cut through the richness of the butter and enhance the green beans' natural sweetness. Taste and adjust the seasoning with additional salt if needed, but the blanching water should have already infused the beans with sufficient saltiness.
Create the Buttery Garlic Sauce
In a large skillet over medium heat, melt the 0.5 cup unsalted butter until it foams but doesn't brown. Add the 4 cloves thinly sliced garlic cloves and cook for 30 seconds until fragrant but not browned—garlic burns quickly, so watch carefully. Immediately remove the skillet from heat and stir in the 0.5 tsp crushed red pepper flakes, reserving a small pinch for garnish if desired.
Return the skillet to medium-low heat and add the drained green beans along with the vinegar mixture. Toss gently to coat the beans evenly with the buttery garlic sauce. The beans should glisten with the sauce and maintain their vibrant green color. If the sauce appears too thin, cook for an additional 1-2 minutes to thicken slightly, but avoid overcooking which would make them mushy.
Finish and Garnish for Presentation
Transfer the green beans to a serving platter and sprinkle with the toasted 0.25 cup slivered almonds and remaining reserved crushed red pepper flakes. Garnish with the 0.25 cup chopped fresh parsley for a pop of color and freshness. The almonds add a satisfying crunch contrast to the tender beans, while the parsley brightens the dish visually and adds a subtle herbal note.
Serve immediately while the beans are still warm and the butter sauce is glossy. The combination of crisp-tender beans, rich butter, bright vinegar, and toasted almonds creates the perfect balance of textures and flavors that defines this old-fashioned preparation. Each bite should deliver that satisfying crunch followed by the buttery, garlicky goodness of the sauce.
Pro Tips For Making Old Fashioned Green Bean
- Trim the Ends: Cut off the very tips of your green beans—about 1/4 inch—before cooking. I learned this the hard way when a batch turned bitter; those tough ends hold the most fiber and don’t soften properly. Takes 2 minutes but makes a real difference in texture.
- Salt the Water First: Boil your water with 1 tablespoon of kosher salt before adding the beans. I used to add it later and ended up with uneven seasoning—some beans tasted bland, others overpowered the garlic. Salted water guarantees every bite gets that bright, balanced flavor.
- Sear the Garlic: Cook your minced garlic in butter over medium heat until it’s just golden—about 30 seconds—before adding vinegar. I was skeptical until I tried it: it deepens the garlic’s flavor without burning, and the vinegar brightens it up instead of clashing. (Yes, even if you’re impatient like me.)
- Toss with Vinegar Last: Add the white vinegar after the beans are tender and drained, then toss immediately. I used to mix it in during cooking, and the acid would dull the butter’s richness. Tossing at the end keeps the beans crisp and the tang sharp—like a wake-up call for your taste buds.
Perfect pairings for these flavors
Protein Pairings
These green beans shine alongside herb-roasted chicken thighs, where the crispy skin contrasts beautifully with the tender beans. I often serve them with pan-seared pork chops—the buttery sauce complements the meat's richness.
For a lighter option, pair with grilled lemon-herb salmon to balance the dish's richness with bright, fresh flavors. 🍗
Bread and Starch Sides
A crusty baguette or sourdough soaks up the buttery sauce perfectly, making it a must-have pairing. For a heartier meal, serve with garlic mashed potatoes or creamy mac and cheese—the vinegar's tang cuts through the richness of both.
I also love pairing these beans with cornbread for a Southern-inspired spread that feels nostalgic and satisfying.
Cheese and Charcuterie
Add a sharp cheddar or aged gouda to your plate—their bold flavors stand up to the green beans' brightness. For a charcuterie board, include prosciutto or salami, which pairs wonderfully with the toasted almonds.
A sprinkle of crumbled blue cheese adds a funky contrast that elevates the entire dish. 🧀
Seasonal Vegetable Complements
In summer, serve these beans alongside grilled zucchini or roasted asparagus for a light, fresh side dish. For fall, pair with butternut squash or roasted Brussels sprouts—both add depth and heartiness. In winter, creamy polenta or wild rice pilaf makes a cozy complement that balances the beans' brightness.
Dessert Pairings
End the meal with a lemon tart or key lime pie to refresh your palate after the buttery, garlicky flavors. For a lighter option, vanilla bean ice cream with a drizzle of honey provides a sweet contrast.
If you're serving a crowd, a classic apple crumble with vanilla ice cream ties the meal together beautifully. 🍋
Nutrition facts
Frequently asked questions
Can I use frozen green beans for this recipe?
While fresh beans are ideal, frozen works in a pinch! Just thaw them completely first and pat them very dry before cooking. Since frozen beans are already blanched, skip the initial boiling step and proceed directly to the skillet. They'll absorb the buttery garlic sauce beautifully, though texture may be slightly softer than fresh.
Why do my green beans turn mushy?
Overcooking is the most common cause. Stick to the 3-minute blanch time and immediately shock them in ice water. For the skillet stage, keep heat at medium-low and cook just until heated through (2-3 minutes). Avoid stirring constantly—gentle tossing maintains their structure.
Can I make this ahead of time?
Yes! Blanch and shock the beans up to 24 hours ahead, storing them in ice water. Reheat gently in the skillet with fresh butter and vinegar. For the full dish, prepare through Step 3 but hold off on garnishing until serving. The sauce will thicken further when reheated, so add a splash of water if needed to restore glossiness.
What's the best way to store leftovers?
Transfer to an airtight container and refrigerate for up to 3 days. To reheat, warm in a skillet with 1 tablespoon butter and 1 teaspoon vinegar over medium heat for 2-3 minutes. For best texture, add a few ice cubes to the skillet while reheating—they'll help restore crispness.
Can I substitute other vinegars?
White vinegar is essential for blanching, but for finishing you can swap red wine vinegar with apple cider vinegar or balsamic vinegar. Use half the amount of balsamic (it's stronger) and add it at the very end to preserve brightness. Lemon juice can be replaced with lime juice for a tangier profile, though lemon's citrus notes work best here.